
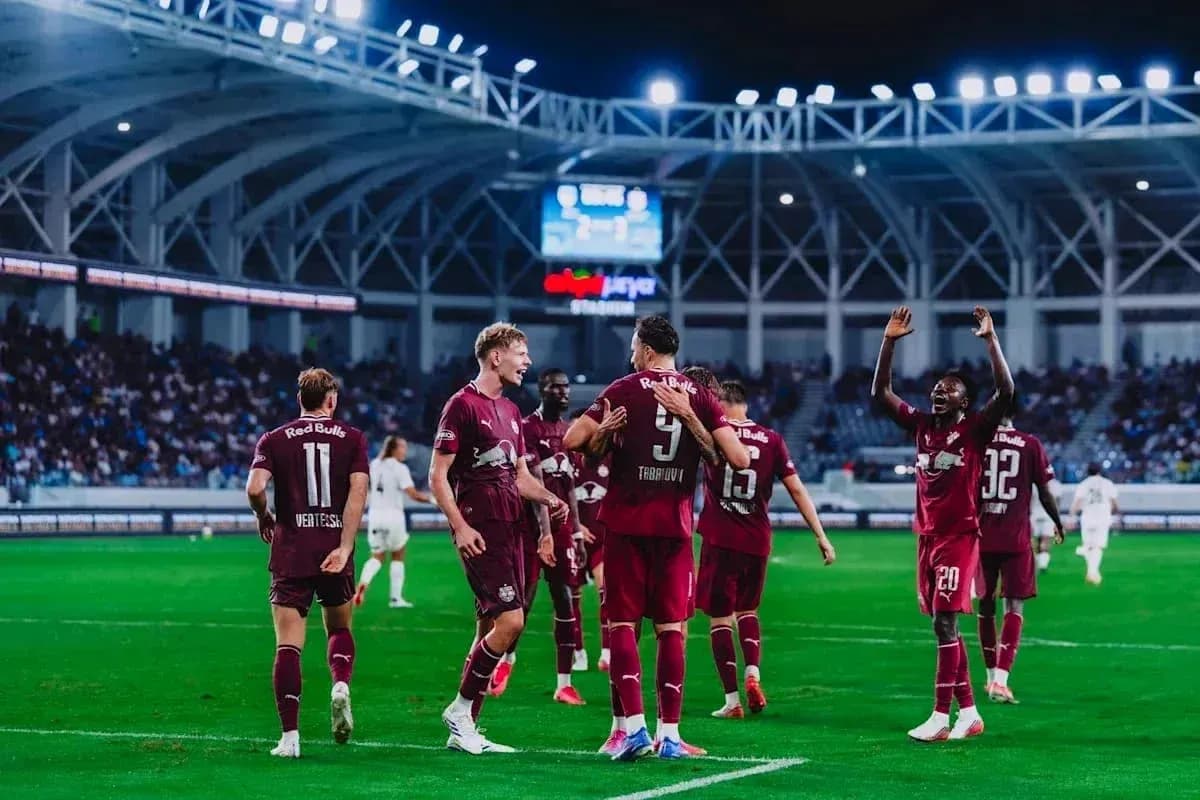
Mjallby AIF vs Red Bull Salzburg Tactical Analysis
Mjallby AIF’s 3-4-3 at Strandvallen was built around compactness and counter-threat, but over 90 minutes it was progressively suffocated by Red Bull Salzburg’s 4-2-3-1 structure and ball circulation. The statistical split – 31% possession and just 1 shot on goal for Mjallby against Salzburg’s 69% and 8 shots on goal – frames a game where the home side defended deep in numbers, while the visitors methodically worked the ball into advanced areas until pressure finally produced the decisive own goal late on.
Mjallby's Formation
Karl Aksum’s 3-4-3 had R. Wallinder protected by a back three of A. Iqbal, M. Nielsen and T. Pettersson, with T. Miettinen and J. Gustavsson flanked by V. Gustafson and O. Lindberg across the midfield band. Up front, J. Kjaer, Áki Samuelsen and J. Bergstrom formed a narrow front line designed more to screen central lanes than to press high. The consequence was a low block that ceded territory and invited Salzburg’s defenders and double pivot to dictate the tempo.
Salzburg's Strategy
Danny Rohl’s 4-2-3-1 for Salzburg was heavily possession-oriented. The back four of N. Veratschnig, K. Boma, V. Zabransky and D. Schmid had time to build, with B. Mazurek and A. Barry as the double pivot stepping into midfield to create overloads. Ahead of them, D. Redzic, Y. Vertessen and E. Baidoo supported central forward H. Tabakovic. With no offsides against them and six corners earned, Salzburg’s positional play consistently pinned Mjallby back, using width and half-space occupation to stretch the home back line horizontally.
Defensive Strategy
Mjallby’s defensive strategy was clear: compress the central zone, accept that Salzburg would have the ball, and trust the back three to deal with crosses and cut-backs. The 12 fouls and single yellow card for Áki Samuelsen at 58’ reflected a side willing to break rhythm when Salzburg threatened to accelerate through the middle. With only 2 corner kicks and 2 offsides, Mjallby rarely committed enough numbers forward to sustain attacks; their transitions were sporadic and usually ended in shots from poor positions, as underlined by the 7 shots off goal and only 1 on target.
Salzburg's Attacking Pressure
Salzburg, by contrast, balanced patience with volume. Seven blocked shots on top of their 8 shots on goal and 9 off goal show a team that repeatedly reached finishing zones around and inside the box, forcing Mjallby’s block to absorb wave after wave. The lack of any cards for Salzburg, combined with only 7 fouls, points to control without desperation: they defended largely through counter-press and structure rather than last-ditch interventions.
Substitution Patterns
The substitution patterns underline the tactical evolution. At 60’, Rohl refreshed his midfield and attacking lines: M. Kjaergaard (IN) came on for B. Mazurek (OUT), adding fresh legs and more vertical passing from deep, while K. Konate (IN) replaced Y. Vertessen (OUT), injecting direct running into the right channel. These changes maintained Salzburg’s intensity against a tiring Mjallby block.
Aksum’s response at 70’ was more reactive than proactive. I. Hoffmann (IN) came on for Áki Samuelsen (OUT), altering the composition of the front line and likely aiming to stabilise the left side defensively after Samuelsen’s booking. Simultaneously, V. Granath (IN) replaced O. Lindberg (OUT), freshening the wide midfield role. Yet the overall structure remained conservative; Mjallby did not significantly alter their pressing height or risk profile despite chasing a result.
Rohl doubled down on control at 74’, bringing on S. Kitano (IN) for H. Tabakovic (OUT) and A. Camara (IN) for D. Redzic (OUT). This nudged Salzburg towards a more mobile, fluid attacking shape, with more midfield runners arriving from deeper positions rather than a fixed penalty-box reference point. Later, at 81’, U. Tohumcu (IN) for E. Baidoo (OUT) further tilted the side towards midfield dominance, ensuring Salzburg could keep recycling possession and pin Mjallby back as the game entered its decisive phase.
Late Changes
Mjallby’s late changes – M. Enggaard (IN) for V. Gustafson (OUT) at 84’ and L. Tidstrand (IN) for J. Kjaer (OUT) at 90’ – hinted at a desire for fresh energy in midfield and attack, but came too late to meaningfully shift the territorial balance. With Salzburg already entrenched in the attacking half and Mjallby’s legs heavy from long defensive phases, the home side’s capacity to build coherent attacks remained minimal.
Decisive Moment
The decisive moment at 90’ encapsulated the tactical story. Under sustained Salzburg pressure, with the visitors still circulating the ball high up the pitch and forcing Mjallby’s back three to defend their own box, T. Pettersson turned the ball into his own net. Officially recorded as an own goal for Red Bull Salzburg, it was the logical outcome of a match in which the away side’s structure and territorial dominance continually stressed the home defence until a mistake arrived.
Statistical Verdict
From a statistical verdict, Salzburg’s 69% possession, 8 shots on goal and 7 blocked shots against Mjallby’s 31% possession and solitary effort on target underline a one-sided shot quality and volume profile. The 6–2 advantage in corners further reflects sustained attacking pressure. With no data on passes or xG, the clearest indicators are field tilt and shot distribution: Salzburg spent most of the match in Mjallby’s half, while the hosts rarely escaped their shell. The 1-0 scoreline via an own goal may look narrow, but tactically it was the product of a structurally superior Salzburg side systematically grinding down a passive, deep-lying Mjallby block at Strandvallen.
Related News

Francesco Totti Reveals Offers from Top European Leagues at Age 48
Benfica Dominates AC Milan in UEFA Europa League Opener
Levski Sofia vs Red Bull Salzburg: Europa League Defeat Analysis

Five Europa League Players to Watch in the 2026/27 Season

Celje vs Red Bull Salzburg Predicted Lineups and Team News

NEC Nijmegen vs Benfica Predicted Lineups: Team News for UEFA Europa League