
Canada vs Morocco: Tactical Analysis of 4-4-2 vs 4-2-3-1
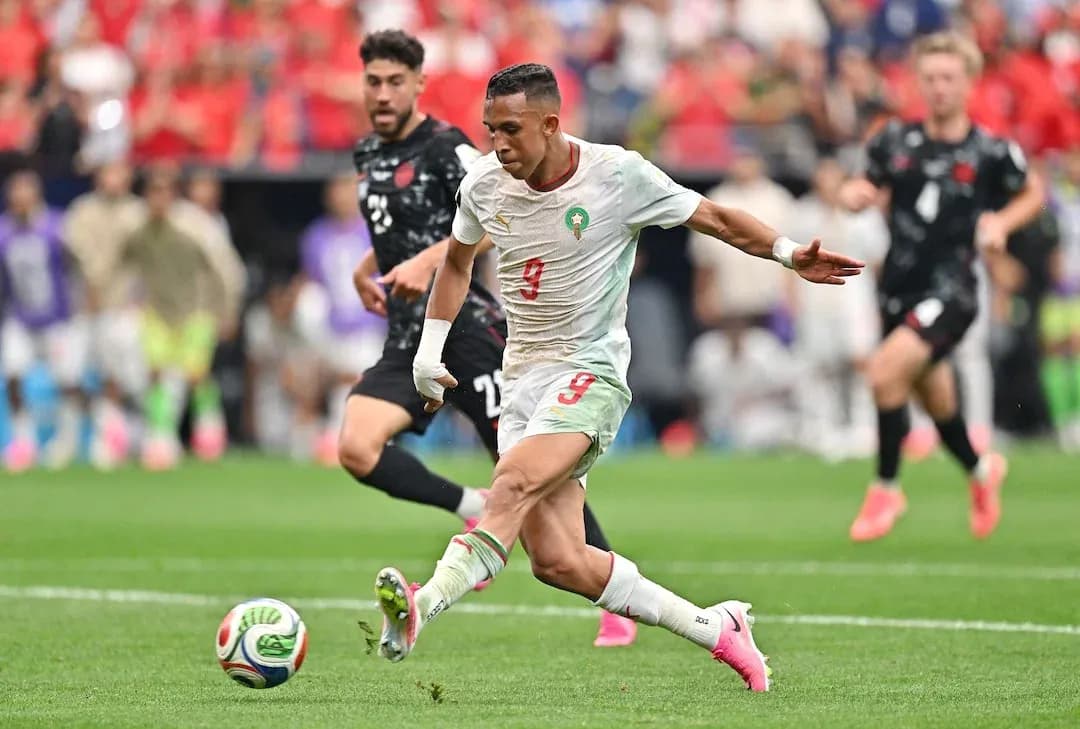
Canada’s 4-4-2 against Morocco’s 4-2-3-1 at NRG Stadium produced a tactical story of control versus direct threat, and of efficiency in both boxes. Despite Canada enjoying a reasonable attacking volume and 11 total shots, Morocco’s structure, press triggers and transitional sharpness dictated the key moments in a 3-0 Round of 16 win.
Canada’s 4-4-2 was built around a fairly classic, vertical interpretation. Maxime Crépeau (Canada) sat behind a back four of Richie Laryea, Luc De Fougerolles, Moise Bombito and Alistair Johnston, with a flat midfield line of Ali Ahmed, Stephen Eustaquio, Niko Sigur and Tajon Buchanan supporting Jonathan David and Tani Oluwaseyi up front. The idea was clear: use the double pivot of Eustaquio and Sigur to connect quickly into the front two, with wide midfielders driving inside to overload Morocco’s central defenders.
However, Canada’s possession profile tells a different story. They had 45% of the ball, completing 272 of 357 passes (76%), which is solid but not dominant. The 11 shots they generated (3 on goal, 3 blocked, 7 inside the box) show they did reach advanced zones, yet the finishing and final-ball clarity were lacking. The expected goals figure of 0.86 underlines that their shot quality was moderate rather than truly dangerous. Morocco’s defensive line, marshalled by Issa Diop and Redouane Halhal, consistently compressed space at the top of the box, forcing Canada’s forwards into contested or rushed efforts.
Morocco’s 4-2-3-1, coached by Mohamed Ouahbi, was designed to control tempo and punish transitions. Yassine Bounou (Morocco) anchored a back four of Achraf Hakimi, Diop, Halhal and Noussair Mazraoui. In front, the double pivot of Ayyoub Bouaddi and Neil El Aynaoui protected central spaces, while Brahim Díaz, Azzedine Ounahi and Bilal El Khannouss supported Ismael Saibari as the nominal striker. In practice, Ounahi often drifted into the right half-space, with Díaz and El Khannouss rotating between lines to overload Canada’s central midfield.
Morocco’s 55% possession and 472 passes (389 accurate, 82%) highlight their technical control. They needed only 5 total shots, 4 on goal, to score three times, a reflection of both their shot selection and Canada’s defensive fragility once broken. Their xG of 0.78 compared to three actual goals underlines just how ruthlessly they converted the few clear openings they created.
The match’s tactical hinge came early in the second half. Up to half-time, with the score 0-0, Canada’s aggressive defensive approach was visible in the foul count: they finished with 24 fouls and four yellow cards, compared to Morocco’s 14 fouls and four yellows. The cards to Richie Laryea (“Argument”), Jonathan David (“Foul”) and Luc De Fougerolles (“Foul”) show a side operating on the edge to disrupt Morocco’s rhythm. Yet this aggression did not translate into control of the central lane; Morocco’s midfield triangle repeatedly found pockets between Canada’s lines.
The first Moroccan goal at 50' exposed Canada’s structural issues. With Canada’s midfield stretched, Hakimi advanced from right-back to deliver the assist, finding Ounahi, who had once again arrived in the half-space. The fact that this came immediately after the interval suggests Ouahbi targeted Canada’s reorganisation phase, instructing Hakimi to push higher and Ounahi to attack the space behind Canada’s wide midfielder. Crépeau (Canada), who made 1 save and had 0.66 goals prevented, was left exposed; the statistic underlines that, relative to the shots he faced, he was close to par, but the defensive unit in front of him allowed too clean a look at goal.
Jesse Marsch’s response was to adjust the front line with Cyle Larin (IN) coming on for Tani Oluwaseyi (OUT) at 63', while Jacob Shaffelburg (IN) later replaced Richie Laryea (OUT) and Promise David (IN) came on for Ali Ahmed (OUT) at 78'. These changes nudged Canada towards a more aggressive, winger-led approach, aiming to stretch Morocco’s back four and deliver more crosses. Yet despite 11 corner kicks to Morocco’s 1, Canada could not turn set-piece volume into high-value chances. Morocco’s zonal and hybrid marking in the box, with Diop and Halhal dominant aerially, limited the danger from these dead-ball situations.
Morocco’s substitutions, by contrast, sharpened their transitional threat. Soufiane Rahimi (IN) came on for Ismael Saibari (OUT) as early as 22', giving them a more direct runner in behind. At 63', Sofyan Amrabat (IN) replaced Bouaddi (OUT), adding experience and positional discipline at the base of midfield, while Chemsdine Talbi (IN) for El Khannouss (OUT) provided fresh energy in the attacking band. These changes preserved the 4-2-3-1 shape but refreshed the pressing and running power in key zones.
The second goal at 82' again showcased Morocco’s vertical clarity. Brahim Díaz, now operating with more freedom between the lines, provided the assist for Ounahi’s second. The pattern repeated: Morocco broke Canada’s midfield line, found a free player between defenders, and attacked the space with minimal touches. Canada’s back four, already carrying yellow cards and heavy foul numbers, could not step out aggressively without risking dismissals, which created a buffer zone for Morocco’s creators.
By the time Jayden Nelson (IN) replaced Tajon Buchanan (OUT) and Jonathan Osorio (IN) came on for Niko Sigur (OUT) at 87', Canada were chasing the game, their structure stretched. Morocco responded by adding Samir El Mourabet (IN) for Ounahi (OUT) and Marwane Saadane (IN) for Issa Diop (OUT), moves aimed at game management and fresh legs in defence and midfield. Even then, Morocco found a third in added time: at 90+8', Rahimi finished another move crafted by Díaz, capping a performance where Morocco’s attacking midfielders maximised almost every dangerous incursion.
In goal, Bounou (Morocco) made 3 saves and, with 0.66 goals prevented, matched Crépeau’s figure but from a more efficient defensive platform. Canada’s 3 shots on goal against him were handled cleanly, reflecting both his positioning and Morocco’s ability to limit second balls.
Statistically, the verdict is clear: Morocco combined higher possession, better pass accuracy, and fewer but higher-yield shots to outplay Canada. Canada’s 0.86 xG versus Morocco’s 0.78 suggests the underlying chance quality was not dramatically different, but Morocco’s finishing and timing were decisive. Canada’s 24 fouls and four yellow cards indicate a reactive, often overstretched defensive phase, while Morocco, despite also receiving four yellows, managed their aggression within a more controlled structure.
Ultimately, this Round of 16 tie turned on Morocco’s superior organisation in the 4-2-3-1, their exploitation of half-spaces through Ounahi and Díaz, and their clinical edge in front of goal, set against a Canadian side that generated volume but lacked the structural stability and penalty-box precision to turn effort into goals.
Related News

Thomas Tuchel Reflects on England's 10-Man World Cup Triumph and a Surprising Regret

Robert Moreno Takes Over as Interim South Korea Coach After World Cup Setback

Jude Bellingham Returns to Form with Real Madrid After World Cup Success

Chloe Kelly, Beth Mead & 13 Lionesses Who Must Shine in the Upcoming WSL Season for England’s 2027 World Cup Bid
Barcelona Cancels World Cup Tribute Amid Political Tensions
Messi Breaks Record for Most Penalties Taken and Missed in FIFA World Cup History